FABO ACADEMY X
CLASS 6
Introduction 2 Subtractive Manufacturing
View Boibee on GitHub
Visit Course Page
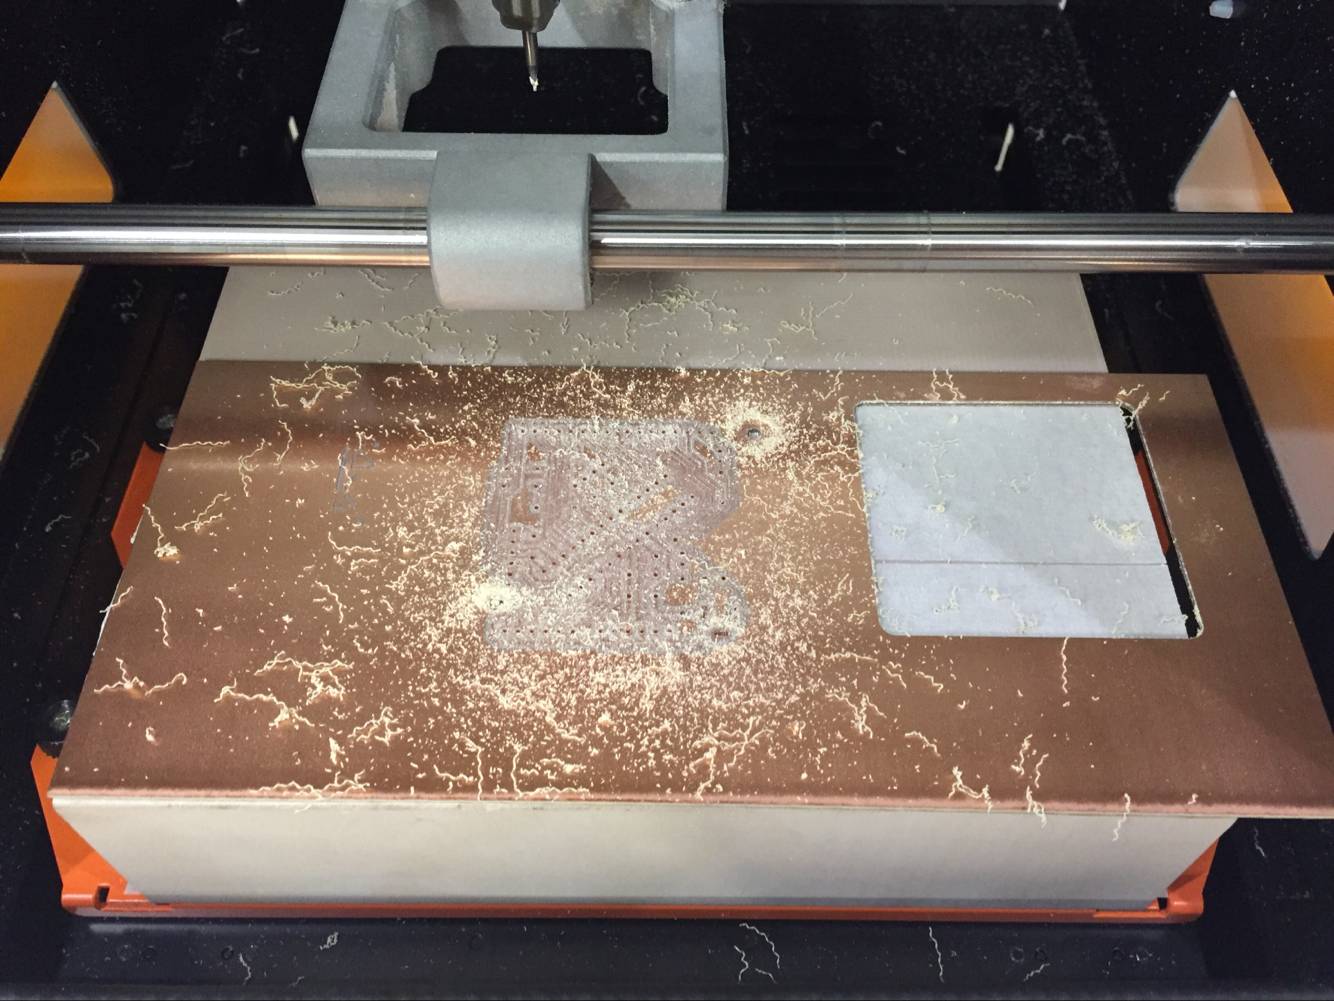
ZZZZZZZZZZZZZZZZZZiiiiiiiiiiii….Here comes MILLING MACHINE!
So this week we have learnt what is Subtractive Manufacturing especially CNC Milling and, most importantly, how to use Milling Machine - Roland SRM-20. And we will cut a PCB as pre-work for Shanghaino!
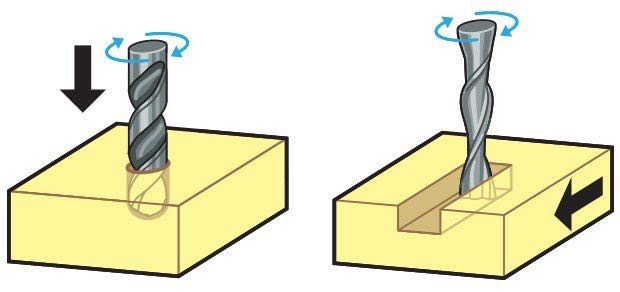
MILLING WORKFLOW
-
3D model.
-
Tool path generation - Gcode or .rml file.
-
Setting up the machine including flating.
-
Milling.
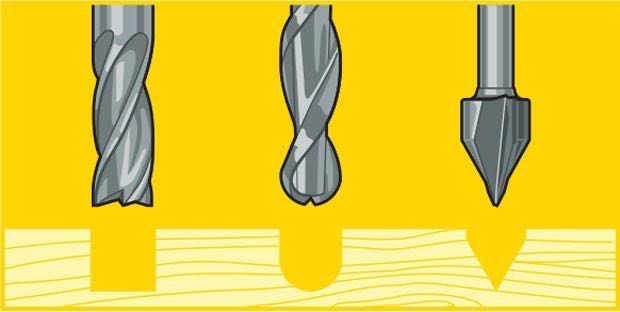
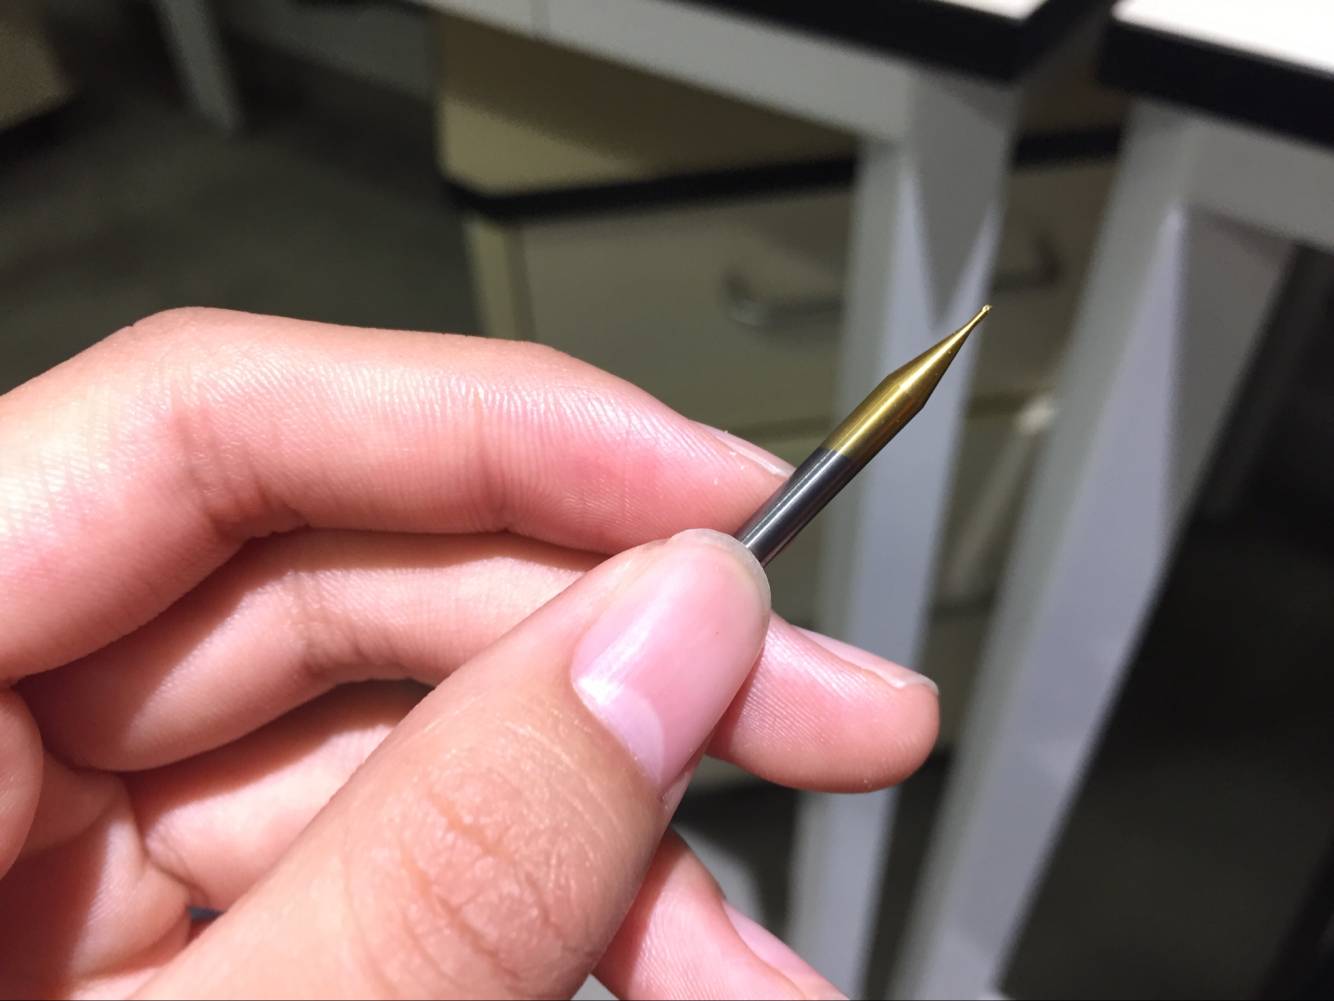
ABOUT Tools
-
Drill Bit : to make holes.
-
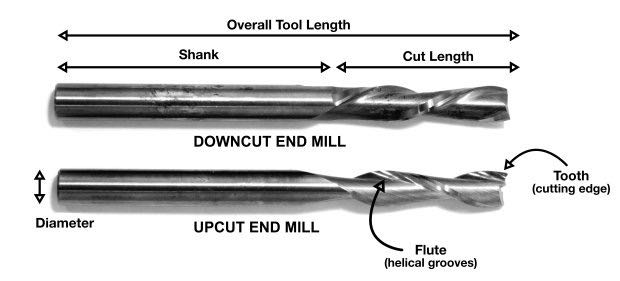
End Mill : to cut in horizontal direction.
ABOUT End Mill
-
More flutes more smoother surface.
-
Fewer flutes are easier to clear up.
-
one, two or four flute are most common.
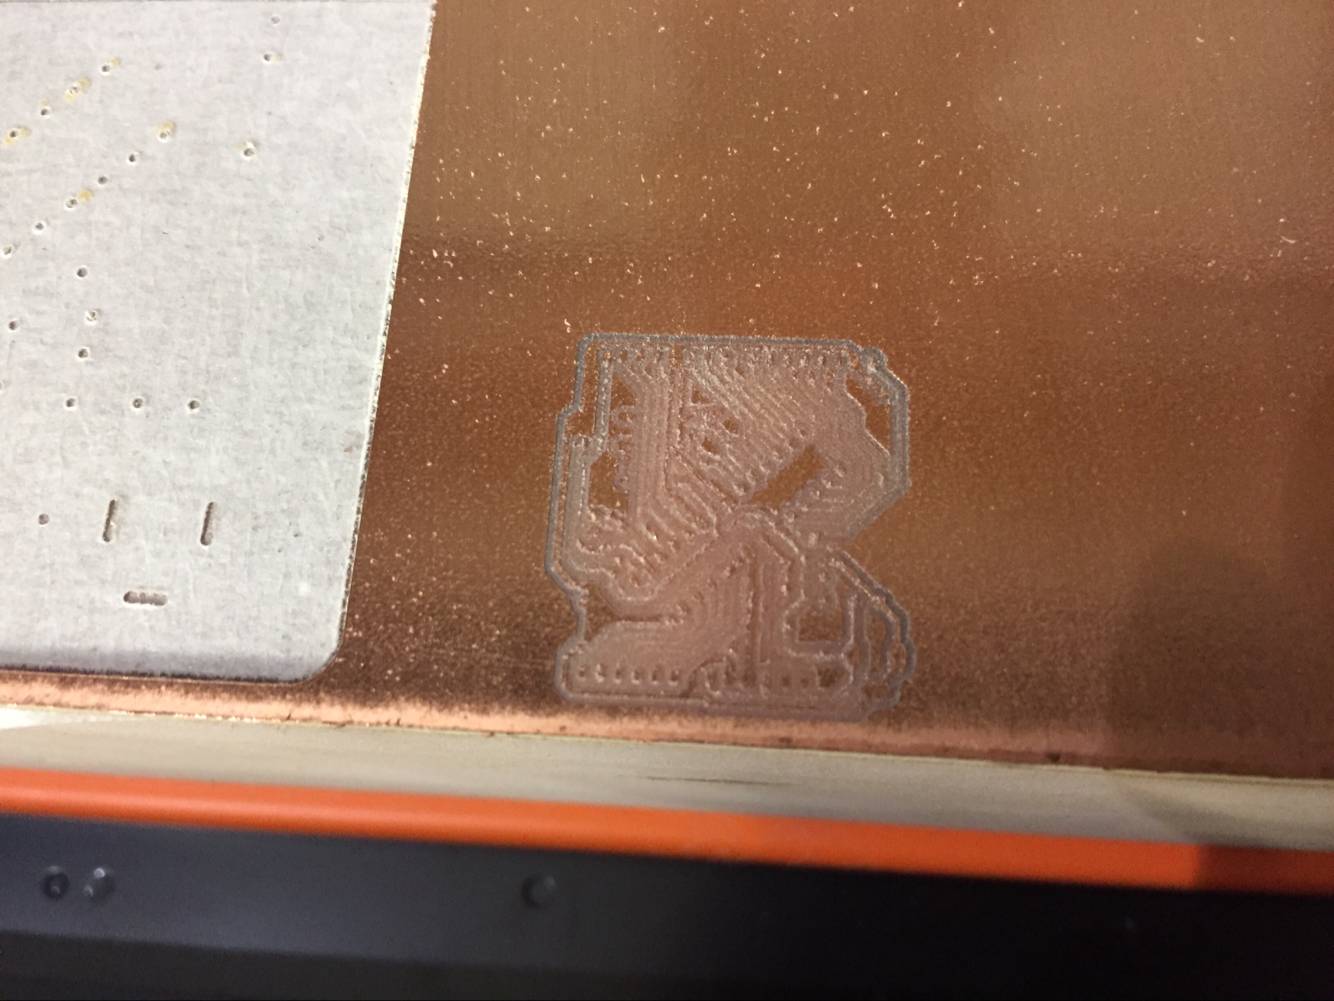
MAKING PCB
-
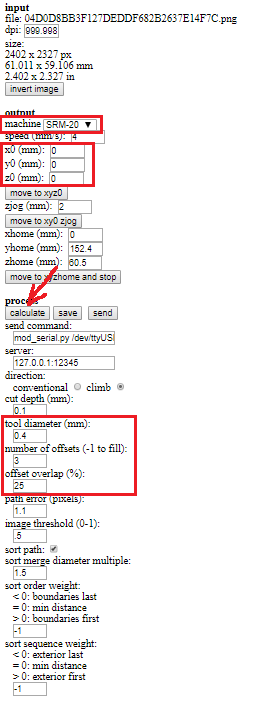
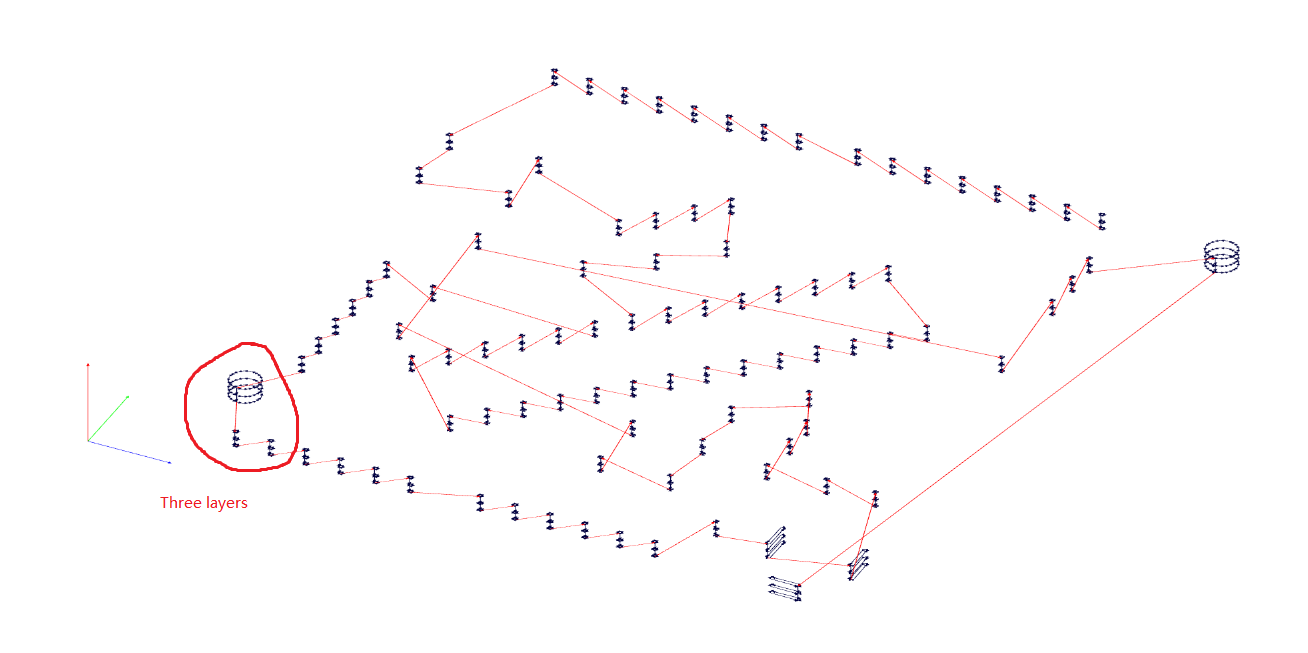
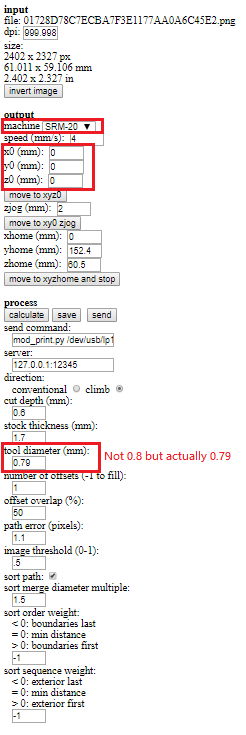
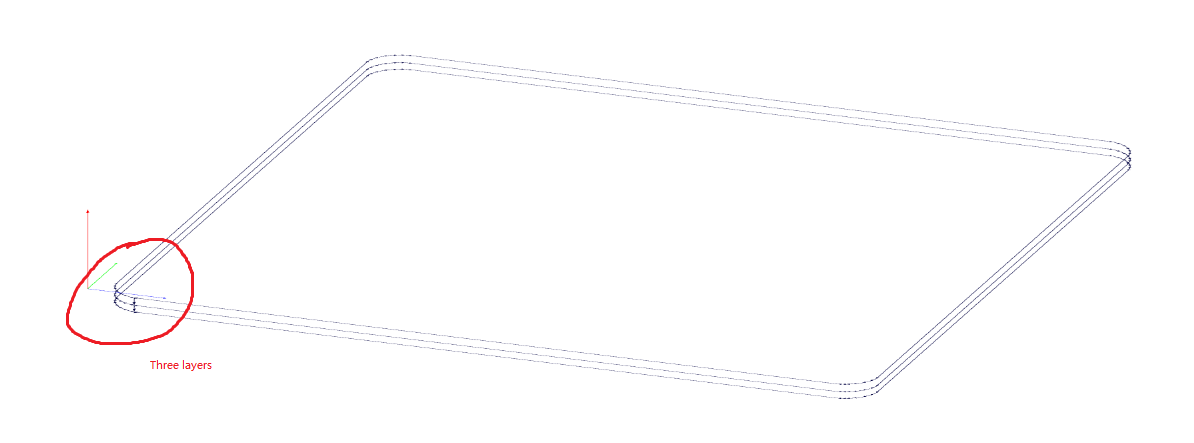
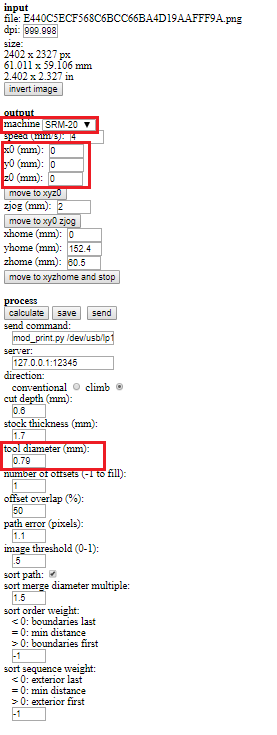
Use fabmodules to generate .rml file from .png. Be careful about the setting of machine ( SRM-20 ), process ( ‘PCB traces(1/64)’ for circuit traces and ‘PCB outline(1/32)’ for circuit pin holes and outline ), x0 y0 z0 ( all should be zero ), tool diameter ( 0.4mm for traces and 0.8mm for pin holes and outline ), number of offsets ( in this case is 3) and offsets overlap ( in this case is 25% to reduce leftover ).
-
Setting the X/Y and Z origin at first part. Then only set the Z origin after changing the milling.
-
At any case after setting Z origin remember UP the milling.
-
My settings are as follows:

- Mistake 1: Choosing Wrong Machine ( I choose MDX-20 instead of SRM-20) the output became much smaller…
- Mistake 2: Broken one milling!!! Maybe because I have make Mistake 1 for 3 or 4 times so the milling just reached the end of its life. orz
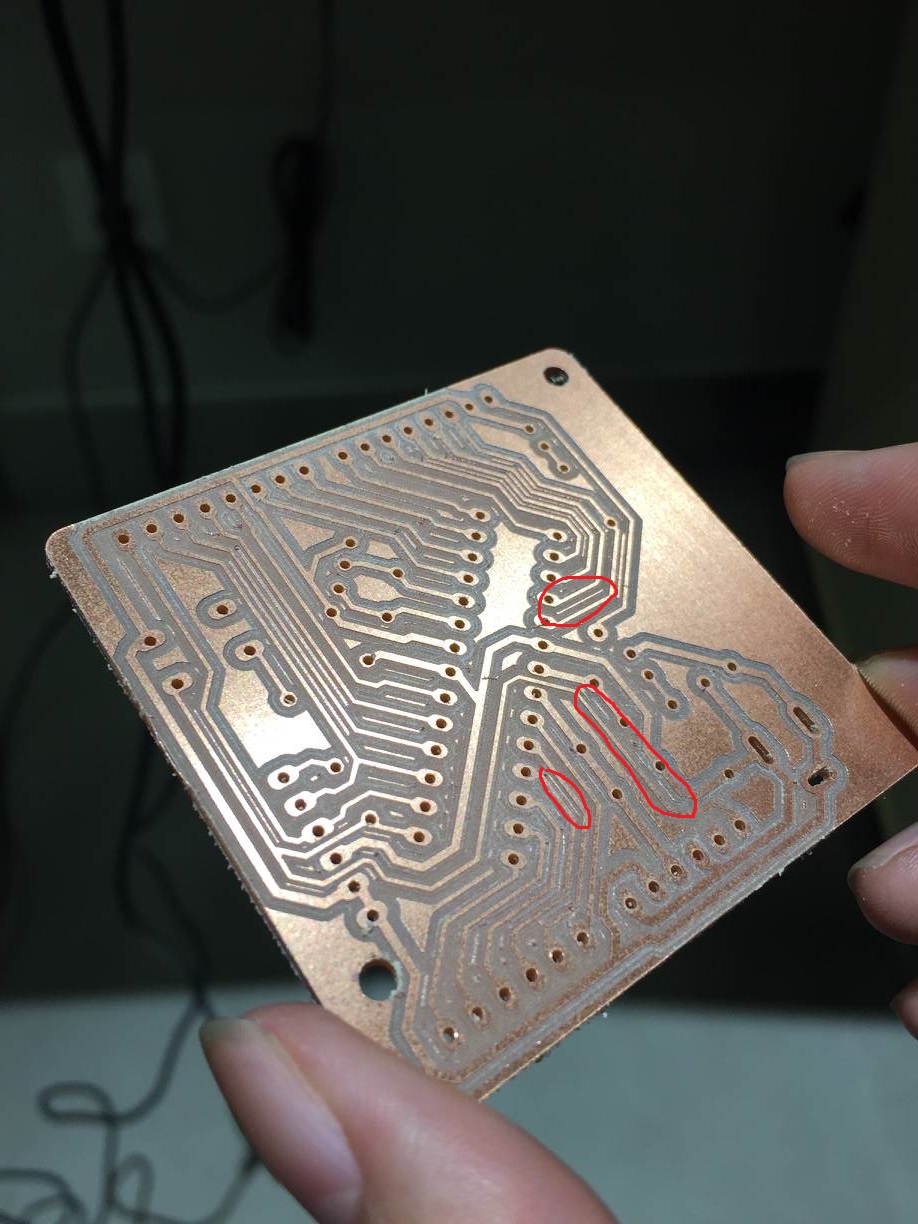
- Finally I finish my PCB.
- Found that even 25% offsets overlap could still have thin leftover.
RELATED LINKS
-
PCB Design Eagle